I made an owl cake for Elias’s 5th birthday this weekend. It wasn’t as hard as I thought, but the directions I had (from Parenting.com) omitted several key details. I thought I’d put the whole thing up online so someone else googling it won’t have to reinvent the wheel and spend an evening biting their nails like I did.
Do the baking the day before the party, so that this thing is stone cold cool.
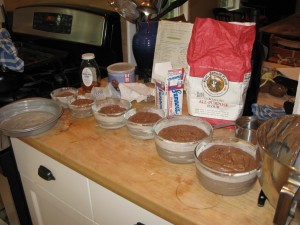
First off, the directions just say to bake the cake in quart and 12 ounce Pyrex bowls. What it leaves out is how much batter, how long do you bake it, and where do you get these exact bowls? Never fear. … You can get the bowls at Target, not in the mixing bowl world, but the the department of storage containers. I got two sets of three nesting storage containers with lids. They had flat bottoms, which worked out okay, and were quart, 10 ounce, and smaller.
I made a double batch of batter (from scratch of course! I will scowl at you terribly if you use a mix), because the solid geometry of calculating the volume of batter in a two-layer, 8-inch cake as compared to 4 bowls of various sizes was way beyond my 9th grade C-level skills. I had a lot extra. I would say that a batch and a half (or a three-layer, 8 inch cake) recipe would be good. Because I didn’t know how it would all fit together, I just baked everything to see what would happen.
Butter and flour those puppies really, really well. Stickage will not help you!
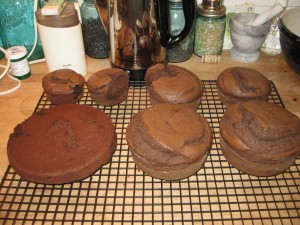
They took forever to bake, because they were so deep. There’s a risk of getting sink holes if they are not set enough, so err on the side of baking them all the way. Make sure a butter knife comes out totally clean before you declare them done. In my oven on convection bake the medium sized (10 oz) bowls took about 50 minutes, and the large (1 qt) bowls took 1 hr and 10 minutes. All the checking was stressing me out because we all know that you’re not supposed to open the oven all the while cakes are baking! Yikes.
They came out of the oven looking like this:
Let all this cool over night, preferably under lock and key (I’m assuming you have kids! Mine tried to have samples….)
Then awake fresh and bright-eyed, ready to assemble this baby.
First make two batches of frosting (don’t use canned or again you will risk the scowl.) I made a 1/4 recipe of the Magnolia Bakery’s classic butter cream for the white frosting. You can make this first then you don’t have to wash everything before moving on to the chocolate. I made a full batch of Lucia’s chocolate sour cream icing, which proved to be just enough to frost the chocolate areas. Fend off the children, send them out to mow the lawn with daddy, and/or placate them with licking of beaters. It’s best if they are not helping at this point.
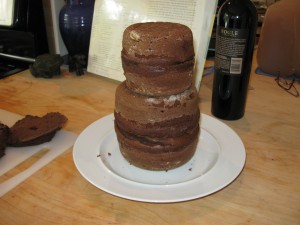
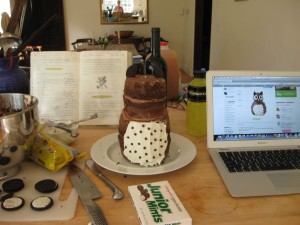
Cut the poofy tops off the cakes so they are all nice and level. Then begin to layer them. First one quart bowl, then a layer of frosting. The other quart bowl, then a small amount of frosting. (Not tons here, because it will get mixed in with the white a moment later, so just enough to stick the next layer on.) Then the first small bowl (head) layer, another dose of frosting. Then top it off with the last layer. Get a skewer (I found a pack of wooden skewers in the kitchen gadgets section of the grocery store) and stick it firmly vertically through all the layers, top to bottom. If some sticks out the top, you’ll need to cut off the extra. You’re result should look like this:
The next step is to do the tummy. I kinda sketched a line around the edge of the area I intended to frost white, then went for it. For some reason the directions say to do the mini-chip spots at this point. I did that, but ended up having to remove some to straighten out boundary issues with the chocolate later on. So I recommend doing the mini chips towards the end.
Here’s how it looked at this stage.
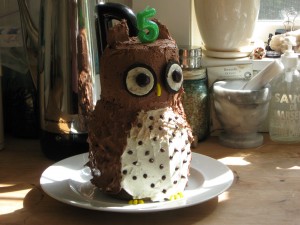
Okay, so on to the rest. Cut the black part of an Oreo into two pieces and poke these on the top for the ears. Frost the whole thing from top to toe. Try to make the head smooth and the body more feathery. Frost in the ears nicely. Then “glue” the half-oreo eyes on with a dab of white frosting, and the Junior Mints on the oreos with another dab. I was freaking out because the white of my oreos was not all that pristine (covered with black crumbs) but it didn’t turn out to be much of a deal when all put together. Use a banana runt for the beak, and more for the toes. NOW add your mini chips for the owl’s breast feathers.
And voila!!
UPDATE: how do you then cut and eat this owl cake, you ask? Well, you simply horrify the children by decapitating it with a huge gleaming knife. Cut the head into quarters or other useful sized pieces. They will be adorable mini-layer cake slices. The children will vie for who gets the eyes. Then cut up the body. Each wedge will split nicely into two layers, each of which makes an okay sized piece.
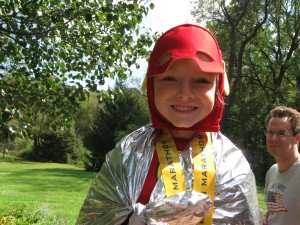
Here’s the happy birthday boy:
 Copyright secured by Digiprove © 2011 Catherine Park
Pingback: Pokemon Black Forest Cake | Fine Young Fauves
Pingback: Owl Cake: Cookie-N-Cream variation | Fine Young Fauves